Learning HTML for Kids!

What’s on this page?
Managing your files and folders
Let’s create some folders
Step 1
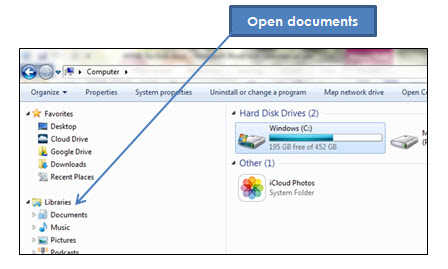
Go to Start, select Computer and then Documents:
Step 2
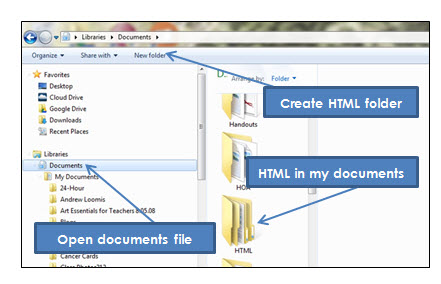
When the Documents folder opens, go to New Folder. A little folder will appear. Name it HTML.
The HTML folder will be where you store all your files and other folders. It’s important that you create a separate folder as you will be going back to it to test your files and later to upload to the Internet.
Step 3
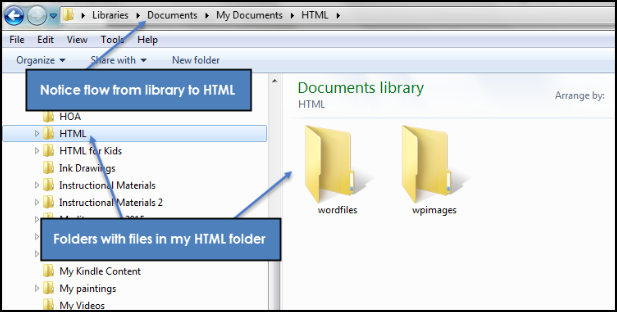
Open your HTML folder. At this point it should be blank. Now create one other folder: wpimages following what you did in step 2. Notice below, I have another folder too. You can create more folders as you go along. Keeping things organized is really, really important. You can waste lots of time trying to find your files.
Now you should be ready to create your webpage file starting in Chapter One.
Website Structure
While this tutorial is based on creating webpages, not necessarily complete websites, I do want to mention just a little on the topic.
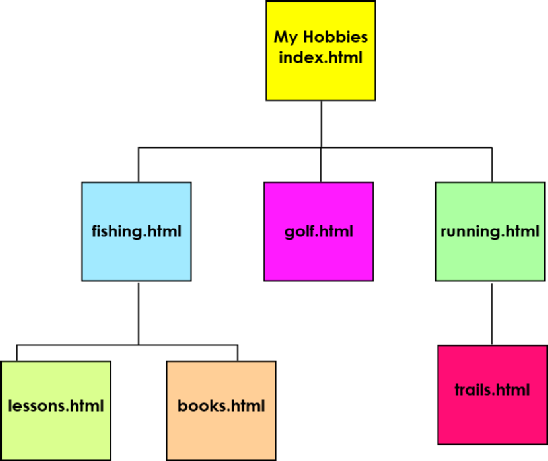
First of all, your first page (or root), must be called index.html. It’s the top-
How to get a domain name, uploading your site to a host company and other issues are beyond the scope of this tutorial. You can find plenty of information on these topics by going online.
Here’s a simple website layout with index.html as the top-
Creating folders
Savings folders
Opening folders
Finding files
Creating folders
Saving folders
Site structure